How to Identify Minerals: A Step-by-Step Guide for Collectors
Learning how to identify minerals is one of the most important skills any collector can develop. With over 5,000 known mineral species on Earth, telling one specimen from another might seem impossible at first. But experienced collectors know that systematic testing of physical properties like hardness, luster, streak, crystal habit, and cleavage can narrow down even the most puzzling specimen. This comprehensive guide walks you through each identification method with practical tips you can use at home or in the field.
Why Mineral Identification Matters for Collectors
Being able to identify minerals is essential whether you are buying specimens at a gem show, rockhounding in the field, or evaluating pieces in your existing collection. Misidentified minerals can lead to overpaying for common species, displaying inaccurate labels, or missing rare finds. Understanding mineral properties also deepens your appreciation for the geological processes that created each specimen. The same identification skills used by professional geologists are accessible to any collector willing to learn a systematic approach.
Step 1: Observe Color and Transparency
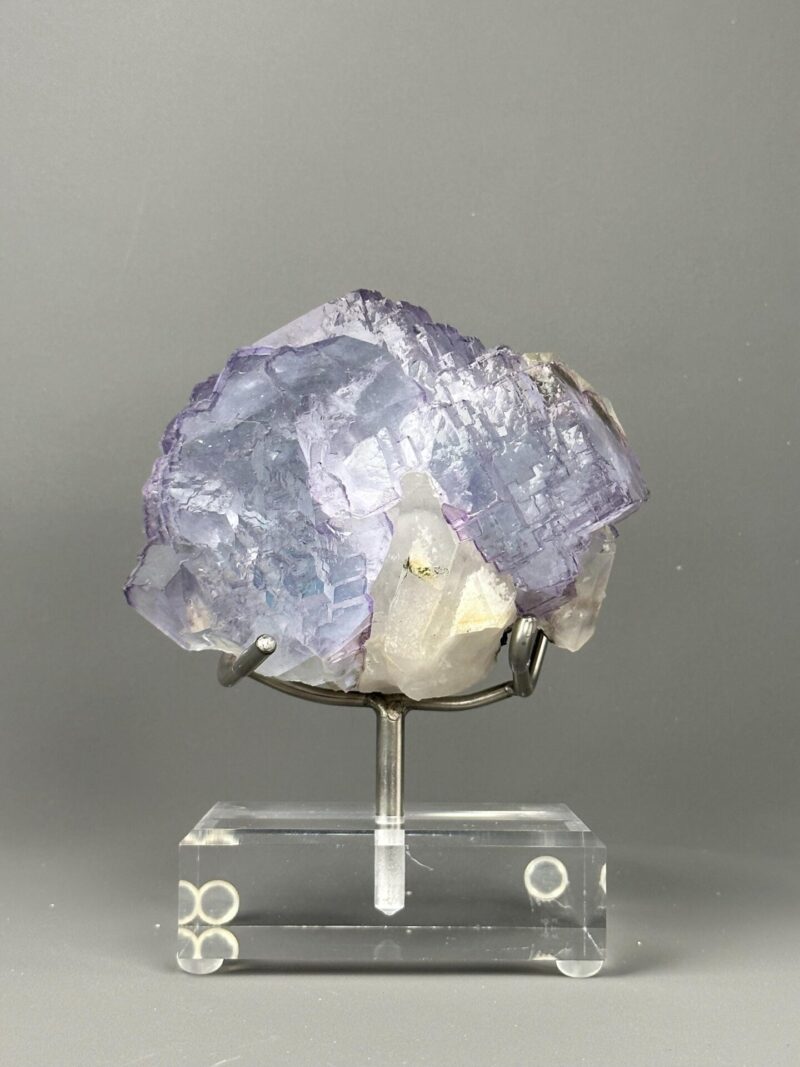
Color is usually the first thing you notice about a mineral, and while it provides useful clues, it can also be misleading. Some minerals are reliably identified by color: malachite is always green, azurite is always blue, and native sulfur is consistently yellow. But many species occur in multiple colors. Fluorite appears in virtually every color of the rainbow, from deep purple to green, blue, yellow, and colorless. Quartz ranges from clear to purple (amethyst), pink (rose quartz), brown (smoky quartz), and yellow (citrine).
Along with color, note the specimen’s transparency. Transparent minerals allow you to see clearly through them, like water-clear quartz and some transparent crystals. Translucent minerals allow light to pass through but blur details, like many fluorite specimens. Opaque minerals block all light, such as pyrite and galena. Recording transparency alongside color gives you two data points from simple observation alone.
Step 2: Examine Crystal Shape and Habit
Every mineral has an internal atomic structure that determines the external shapes its crystals naturally grow into. These external forms are called crystal habits, and recognizing them is one of the most powerful identification tools available. Quartz forms hexagonal prisms with pointed terminations. Fluorite grows as cubes or octahedrons. Pyrite is famous for its metallic cubes with striated faces. Calcite appears in rhombohedrons, scalenohedrons, and prismatic forms depending on its growth conditions.
Beyond individual crystal shapes, observe the overall growth pattern. Minerals can be prismatic (elongated like columns), tabular (flat like plates), acicular (needle-like), botryoidal (grape-like rounded surfaces), fibrous, or massive (no visible crystal faces). Even when a specimen lacks perfect crystal faces, the general habit combined with other properties can point you toward the correct identification. Metallic mineral specimens like stibnite display distinctive acicular habits that are immediately recognizable with practice.
Step 3: Test Hardness Using the Mohs Scale
The Mohs Hardness Scale ranks minerals from 1 (softest, talc) to 10 (hardest, diamond) based on scratch resistance. This is one of the most reliable identification tests because each mineral has a consistent hardness regardless of color or crystal form. You can perform hardness tests with everyday objects: a fingernail (hardness 2.5), copper coin (3.5), steel nail (5.5), glass plate (5.5), and a quartz crystal (7).
The full Mohs scale runs: 1 Talc, 2 Gypsum, 3 Calcite, 4 Fluorite, 5 Apatite, 6 Orthoclase, 7 Quartz, 8 Topaz, 9 Corundum, 10 Diamond. For example, if your specimen scratches glass but cannot scratch quartz, its hardness is between 5.5 and 7, which eliminates the vast majority of minerals immediately. Selenite (gypsum) is so soft at hardness 2 that a fingernail scratches it. Aquamarine (beryl) at 7.5 to 8 will scratch quartz easily. Always test on an inconspicuous surface to avoid damaging display faces.
Step 4: Check the Luster
Luster describes how a mineral’s surface interacts with light and is one of the quickest ways to narrow your identification. The two broadest categories are metallic and non-metallic. Metallic luster makes a mineral look like polished metal: pyrite, galena, and other metallic minerals all show this distinctive shine. Non-metallic lusters include vitreous (glassy, like quartz and fluorite), adamantine (brilliant and diamond-like), pearly (like the surface of a pearl, seen in talc and some micas), silky (a fibrous sheen, as in satin spar gypsum), resinous (like dried resin, seen in sphalerite), and earthy or dull (no shine, like kaolin clay).
When describing luster, examine a fresh surface rather than a weathered exterior. Weathering can make a vitreous mineral appear dull, leading to misidentification. If you have a freshly broken or cleaved surface available, use that for your luster assessment.
Step 5: Perform a Streak Test
The streak test reveals the color of a mineral in powdered form, which is often different from the color of the whole specimen. To perform the test, rub the mineral firmly across an unglazed white porcelain tile (called a streak plate). The powder left behind is the streak color. This test works best on minerals softer than the streak plate itself (about hardness 7).
Streak is remarkably consistent compared to surface color. Hematite always produces a reddish-brown streak whether the specimen appears silver, black, or red. Pyrite leaves a greenish-black streak despite its golden color, immediately distinguishing it from actual gold, which leaves a yellow streak. Fluorite and quartz both produce white streaks regardless of their body color. For black minerals that look similar on the surface, the streak test often reveals critical differences.
Step 6: Examine Cleavage and Fracture
When minerals break, they either cleave along smooth, flat planes determined by their crystal structure, or they fracture irregularly. Cleavage is extremely diagnostic because it reflects the internal atomic arrangement. Mica has perfect basal cleavage, splitting into thin flexible sheets. Calcite breaks along three planes to produce rhombohedral fragments. Fluorite cleaves along four planes to form octahedral shapes. Galena has cubic cleavage, breaking into small cubes.
Fracture patterns are equally useful. Quartz displays conchoidal fracture, producing smooth, curved, shell-like surfaces similar to broken glass. Green minerals like chrysocolla show conchoidal to uneven fracture depending on the specimen. Minerals with hackly fracture produce jagged, torn metal-like surfaces, typically seen in native metals like copper. Use a hand lens to examine broken edges closely, as the difference between cleavage and fracture can distinguish otherwise similar minerals.
Step 7: Test for Special Properties
Some minerals possess unique properties that make identification nearly instant. Calcite reacts with dilute hydrochloric acid (or even household vinegar) by fizzing and producing carbon dioxide bubbles. Magnetite is strongly magnetic and will attract a magnet or deflect a compass needle. Fluorite often fluoresces under ultraviolet light, producing vivid blue, green, or purple glows. Halite (rock salt) tastes salty. Large barite specimens feel surprisingly heavy for their size due to high specific gravity.
Other special properties include double refraction (seen dramatically in Iceland spar calcite, where text appears doubled when viewed through the crystal), piezoelectricity in quartz, and thermoluminescence in some fluorite specimens. Rhodochrosite can be identified by its distinctive pink color combined with rhombohedral cleavage and effervescence in warm acid. Learning these unique traits for common species accelerates identification dramatically.
Step 8: Consider Specific Gravity
Specific gravity measures how dense a mineral is compared to water. While precise measurement requires specialized equipment, you can develop a useful sense of relative density just by hefting specimens in your hand. Barite (SG 4.5) feels noticeably heavier than calcite (SG 2.7) of similar size. Galena (SG 7.6) is remarkably heavy. Native gold (SG 19.3) is unmistakably dense. With practice, this quick “heft test” becomes a surprisingly useful diagnostic tool, especially for distinguishing minerals that look similar but have different compositions.
Essential Tools for Mineral Identification
You do not need a laboratory to identify most minerals. A basic field kit should include a hand lens (10x magnification), an unglazed porcelain streak plate, a copper coin, a steel nail or pocket knife, a small piece of glass, a weak magnet, a bottle of dilute acid or vinegar, and a notebook for recording observations. A UV flashlight adds the ability to test for fluorescence. Carrying these tools on collecting trips or having them at your desk when evaluating purchases ensures you can make informed identifications anywhere.
Common Identification Mistakes to Avoid
The most common mistake beginners make is relying solely on color. As noted above, many minerals share colors, and individual species can appear in many different colors. Always combine at least three or four tests before making an identification. Another frequent error is confusing synthetic or treated specimens with natural ones. Heat-treated amethyst is sold as citrine, dyed agate appears in unnatural colors, and glass imitations can fool casual observers. Buying from reputable dealers and developing your testing skills protects your collection from misidentified specimens.
Skipping the hardness test is another common shortcut that leads to wrong identifications. Two minerals may share color, luster, and crystal habit but differ significantly in hardness. Testing hardness takes seconds and eliminates many wrong possibilities immediately.
Practice With Common Minerals
The best way to develop identification skills is to practice with known specimens. Start with common species that are easy to obtain and display clearly different properties. Fluorite teaches you about cubic crystal habit, perfect octahedral cleavage, vitreous luster, and fluorescence. Pyrite demonstrates metallic luster, cubic habit, and misleading color. Calcite shows rhombohedral cleavage, acid reactivity, and double refraction. Quartz illustrates hexagonal habit, conchoidal fracture, and hardness 7. Malachite provides practice with botryoidal habit, distinctive green color, and effervescence in acid.
Once you are comfortable with these common species, expand to minerals you encounter less frequently. Each new species you learn to identify adds to your mental database and makes future identifications faster. Browse our complete mineral specimen collection to see the full range of species and forms, or explore specific categories like blue crystals, purple crystals, red and orange crystals, and yellow crystals to study color variations across multiple species.
Explore Our Mineral Guides
For detailed information on specific minerals, read our in-depth collector guides: Fluorite Guide, Calcite Guide, Pyrite Guide, Malachite Guide, Azurite Guide, Aquamarine Guide, Vanadinite Guide, Selenite Guide, Smoky Quartz Guide, Rhodochrosite Guide, Amazonite Guide, Lapis Lazuli Guide, Lepidolite Guide, and How Do Geodes Form.
Ready to start or expand your collection? Miniature specimens are perfect for beginners learning identification, while large cabinet specimens showcase crystal properties at an impressive scale. Browse our complete inventory of authentic mineral specimens from world-class localities.